Support
We are ready to help you with all your
information needs here.
100 plus years of service ready to assist you
Setting up your POP3 email account in Outlook 2010 and Outlook 2013 are very similar. Here are the steps to for setting up your account:
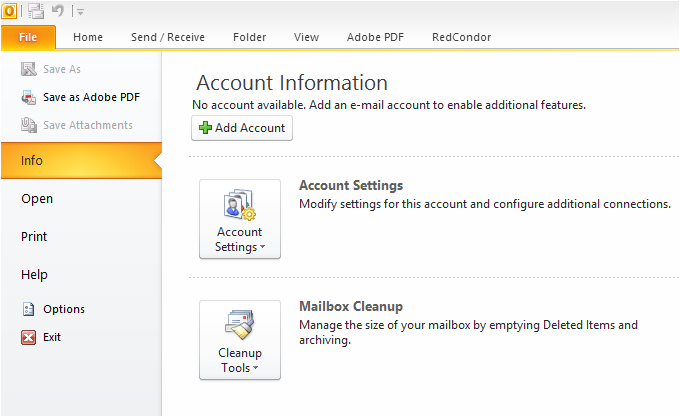
1. Open Outlook and click on the File tab and then the Add Account button.
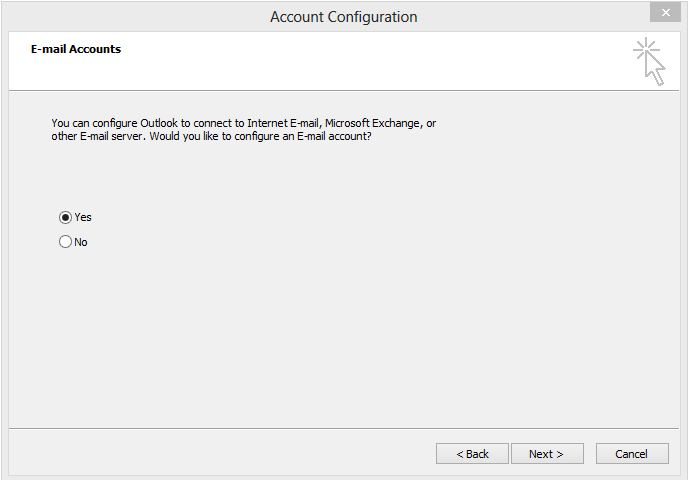
2. Answer Yes when asked if you want to configure an email account.
3. On the Add New Account screen you can put in your Name, E-mail Address, and Password. However, the key to this step is that you need to select Manually configure server settings or additional server types in order to set up a POP3 account.
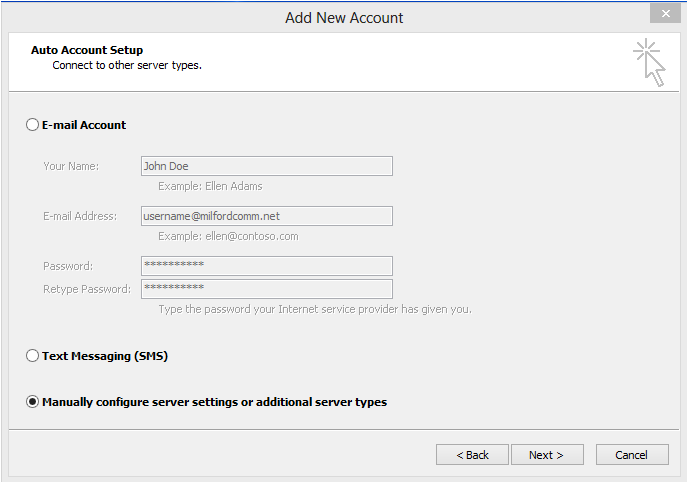
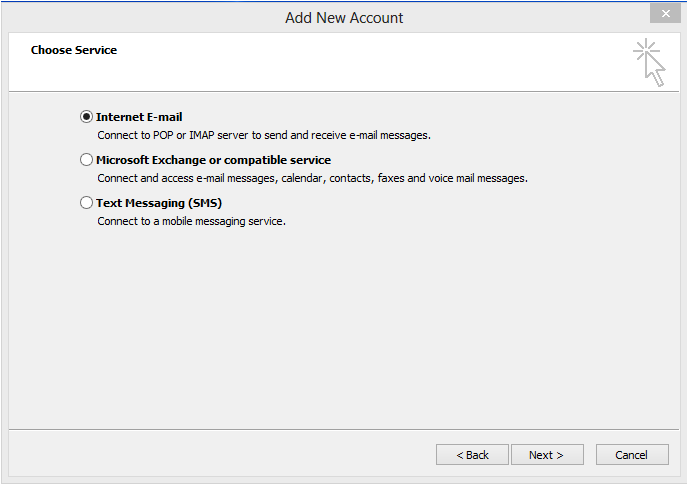
4. Select Internet E-mail.
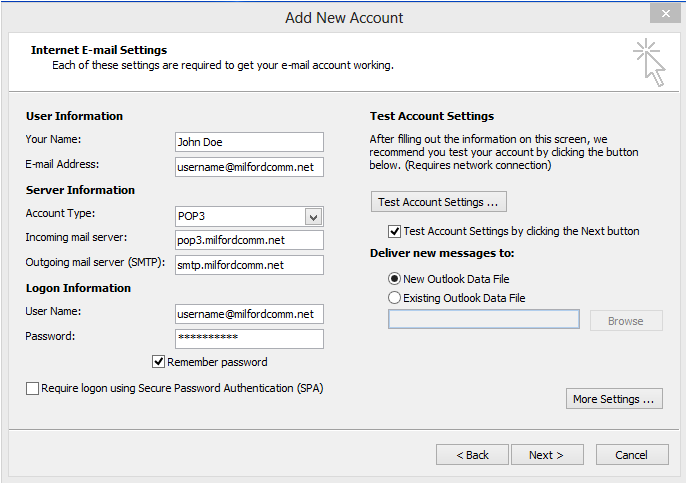
5. Enter your mail server settings for your POP3 account as shown below. When this window has been filled in click on the More Settings button on the lower right hand corner of the window.
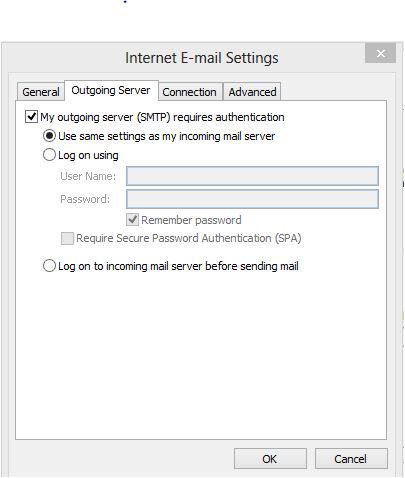
6. On the Internet E-mail Settings box that pops up choose the Outgoing Server tab. Check the box saying My outgoing server (SMTP) requires authentication. Below it take the option to Use same settings as my incoming mail server.
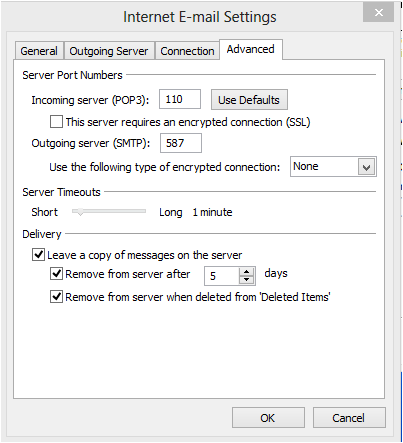
7. Select the Advanced tab and change the outgoing server port from 25 to 587. In addition, choose the Delivery options you prefer at the bottom of the window. A suggested setting would be to remove the emails from the server after 5 days. You can adjust this up or down depending on your needs and the volume of email that you receive.
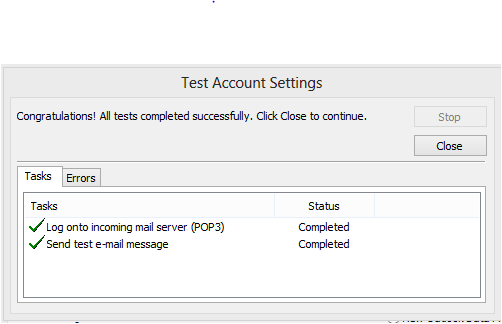
8. Choose OK at the bottom of the Internet E-mail Settings window. This window will disappear and you can click Next at the bottom of the Add New Account window. The email program will automatically test your email settings and let you know if they are correct.
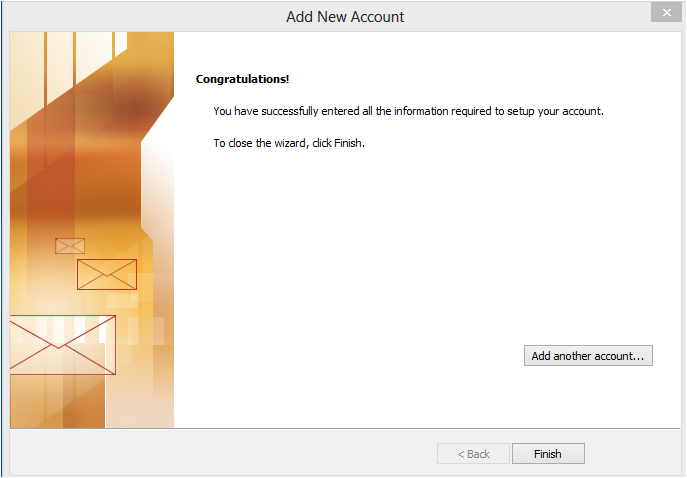
9. Click Finish to complete your account setup and begin downloading email.